NGINX安装配置
首先到NGINX官网下载高于1.9.5的版本,http://nginx.org/,我这里推荐使用稳定的1.10.0。
cd 到 root目录下,下载nginx1.10.0
wget http://nginx.org/download/nginx-1.10.0.tar.gz
下载好后解压
tar -xvzf nginx-1.10.0.tar.gz
转到NGINX目录
cd nginx-1.10.0.tar.gz
准备编译环境
yum install gcc gcc-c++ autoconf automake zlib zlib-devel pcre-devel
需要注意的是HTTP2.0模块需要openssl1.0.1以上的版本来编译才能使用,而多数Linux/Unix系统下普遍为openssl1.0.1,所以需要下载openssl1.0.1以上的版本,配置中我使用的是openssl1.0.2h
wget https://www.openssl.org/source/openssl-1.0.2h.tar.gz
同样解压
tar -xvzf openssl-1.0.2h.tar.gz
转入NGINX目录
cd nginx-1.10.0
检测NGINX编译环境
./configure \--prefix=/etc/nginx \--sbin-path=/usr/sbin/nginx \--conf-path=/etc/nginx/nginx.conf \--error-log-path=/var/log/nginx/error.log \--http-log-path=/var/log/nginx/access.log \--pid-path=/var/run/nginx.pid \--lock-path=/var/run/nginx.lock \--http-client-body-temp-path=/var/cache/nginx/client_temp \--http-proxy-temp-path=/var/cache/nginx/proxy_temp \--http-fastcgi-temp-path=/var/cache/nginx/fastcgi_temp \--http-uwsgi-temp-path=/var/cache/nginx/uwsgi_temp \--http-scgi-temp-path=/var/cache/nginx/scgi_temp \--user=nginx \--group=nginx \--with-openssl=/root/openssl-1.0.2h \--with-http_ssl_module \--with-http_realip_module \--with-http_addition_module \--with-http_sub_module \--with-http_dav_module \--with-http_flv_module \--with-http_mp4_module \--with-http_gunzip_module \--with-http_gzip_static_module \--with-http_random_index_module \--with-http_secure_link_module \--with-http_stub_status_module \--with-http_auth_request_module \--with-mail \--with-debug \--with-mail_ssl_module \--with-file-aio \--with-ipv6 \--with-threads \--with-stream \--with-stream_ssl_module \--with-http_slice_module \--with-http_v2_module 成功后编译NGINX
make && make install
编译完成后开始配置NGINX,首先修改/etc/nginx/nginx.conf
user nginx nginx;worker_processes auto;error_log /var/run/error.log info;pid /var/run/nginx.pid;lock_file /var/run/nginx.lock;events { worker_connections 4096; accept_mutex off;}http { include mime.types; server_names_hash_bucket_size 64; default_type application/octet-stream; access_log off; aio threads; sendfile on; sendfile_max_chunk 512k; tcp_nopush on; tcp_nodelay on; keepalive_timeout 5; gzip on; gzip_disable “MSIE [1-6].(?!.*SV1)”; gzip_http_version 1.1; gzip_vary on; gzip_proxied any; gzip_min_length 1000; gzip_buffers 16 8k; gzip_comp_level 6; client_max_body_size 256m; gzip_types text/plain text/css text/xml text/javascript application/json application/x-javascript application/xml application/xml+rss; log_format main '$remote_addr - $remote_user [$time_local] "$request" ' '$status $body_bytes_sent "$http_referer" ' '"$http_user_agent" "$http_x_forwarded_for"'; proxy_connect_timeout 5; proxy_read_timeout 60; proxy_send_timeout 5; proxy_buffer_size 16k; proxy_buffers 4 64k; proxy_busy_buffers_size 128k; proxy_temp_file_write_size 128k; proxy_temp_path /home/temp_dir; include vhost/*.conf;} 然后在/etc/nginx/vhost中添加个虚拟主机目录,比如www.XXX.com.conf,这里的证书可以在沃通中免费申请,红色是配置SSL模块和H2模块的重要部分
server { listen 443 ssl http2; listen [::]:443 ssl http2; server_name www.XXX.com XXX.com; charset utf-8; ssl_certificate /etc/nginx/vhost/www.XXX.com.crt; ssl_certificate_key /etc/nginx/vhost/www.XXX.com.key; ssl_session_cache shared:SSL:20m; ssl_session_timeout 10m; ssl_protocols TLSv1 TLSv1.1 TLSv1.2; ssl_prefer_server_ciphers on; ssl_ciphers 'ECDH+AESGCM:ECDH+AES256:ECDH+AES128:DH+3DES:!ADH:!AECDH:!MD5'; root /home/www.XXX.com; location / { aio threads=default; index index.html index.htm index.php; } error_page 404 403 /404.html; error_page 500 502 503 504 /50x.html; location ~ \.php$ { fastcgi_pass 127.0.0.1:9000; fastcgi_index index.php; fastcgi_split_path_info ^((?U).+\.php)(/?.+)$; fastcgi_param SCRIPT_FILENAME $document_root$fastcgi_script_name; include fastcgi_params; }} 配置完成后在给Linux添加个NGINX用户和用户组
groupadd -r nginx
useradd -s /sbin/nologin -g nginx -r nginx
最后检测NGINX配置是否正常
nginx -t
正常的情况下加入Systemctl模块,开机启动,到/usr/lib/systemd/system目录下创建nginx.service
[Unit]Description=nginx - high performance web server Documentation=http://nginx.org/en/docs/After=network.target remote-fs.target nss-lookup.target[Service]Type=forkingPIDFile=/var/run/nginx.pidExecStartPre=/usr/sbin/nginx -t -c /etc/nginx/nginx.confExecStart=/usr/sbin/nginx -c /etc/nginx/nginx.confExecReload=/bin/kill -s HUP $MAINPIDExecStop=/bin/kill -s QUIT $MAINPIDPrivateTmp=true[Install]WantedBy=multi-user.target 保存后,加入开机启动
systemctl enable nginx
开启nginx
systemctl start nginx
验证HTTP2.0是否成功可以使用Chrome的开发模式下的NetWork,如图
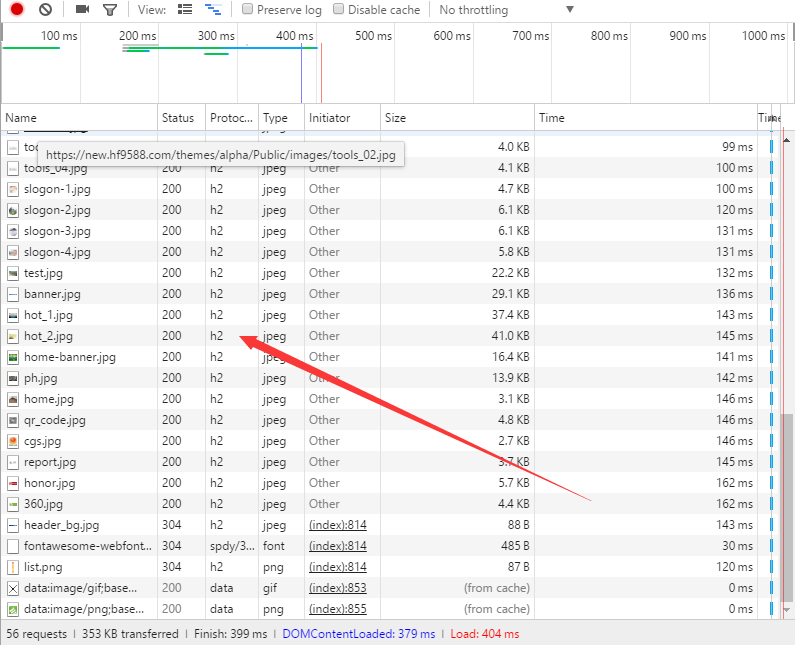
如果这里显示的是H2则说明配置成功!!
PHP-FPM安装配置
同样首先到php官网下载php.tar.gz,推荐使用最新的PHP7.0.6,将他上传到root中,解压
tar php.tar.gz
cd php
安装PHP所需环境
yum install libacl libacl-devel libxml2 libxml2-devel openssl openssl-devel bzip2 bzip2-devel libcurl libcurl-devel enchant enchant-devel gd gd-devel gmp gmp-devel libmcrypt libmcrypt-devel libtidy libtidy-devel libxslt libxslt-devel
检测编译
'./configure' '--disable-debug' '--disable-rpath' '--enable-fpm' '--with-fpm-user=nginx' '--with-fpm-group=nginx' '--with-fpm-acl' '--with-libxml-dir' '--with-openssl' '--with-kerberos' '--with-pcre-regex' '--with-zlib' '--enable-bcmath' '--with-bz2' '--enable-calendar' '--with-curl' '--enable-dba' '--with-enchant' '--enable-exif' '--disable-fileinfo' '--with-pcre-dir' '--enable-ftp' '--with-gd' '--with-jpeg-dir' '--with-png-dir' '--with-zlib-dir' '--with-xpm-dir' '--with-freetype-dir' '--enable-gd-native-ttf' '--with-gettext' '--with-gmp' '--with-mhash' '--enable-mbstring' '--enable-mbregex' '--with-mcrypt' '--with-mysqli' '--enable-embedded-mysqli' '--with-mysql-sock=/tmp/mysql.sock' '--enable-pcntl' '--with-pdo-mysql' '--enable-session' '--enable-shmop' '--enable-soap' '--enable-sockets' '--enable-sysvsem' '--with-tidy' '--enable-wddx' '--with-xmlrpc' '--enable-xml' '--with-iconv-dir' '--with-xsl' '--enable-zip' '--enable-mysqlnd' '--without-pear' '--enable-shared'
成功后编译
make && make install
编译完成后配置php-fpm,到/usr/local/etc修改php-fpm.conf
将最底部的修改为include=/usr/local/etc/php-fpm.d/*.conf,然后修改/usr/local/etc/php-fpm.d/www.conf,修改两处
;pool name ('www' here)
[nginx]
user = nginx
group = nginx
修改完成后检测是否正确
php-fpm -t
正确添加Systemctl模块,直接到php.tar.gz解压后的文件夹中找/sapi/fpm/init.d.php-fpm,并把他复制到/etc/init.d/中,添加权限
chmod +x /etc/init.d/php-fpm
chkconfig --add php-fpm
chkconfig php-fpm on
加入开机启动
systemctl enable php-fpm
开启php-fpm
systemctl start php-fpm
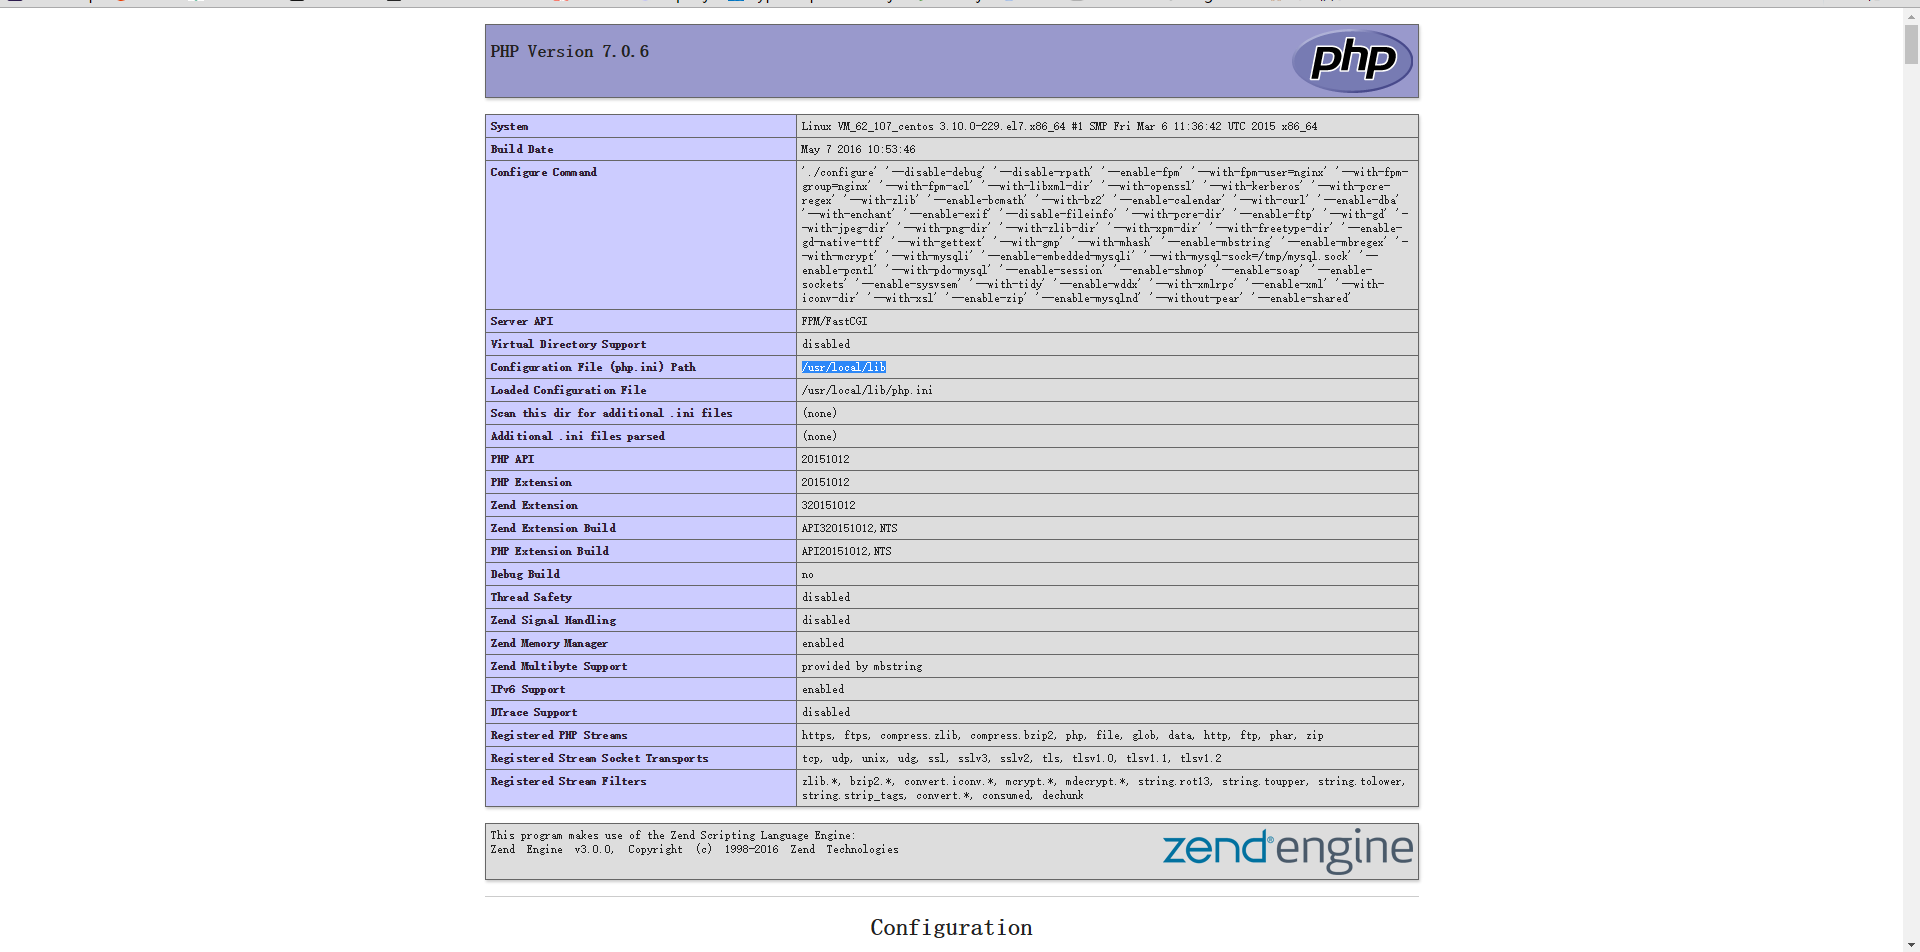
创建phpinfo测试一下,如图
MaraiDB安装配置
MariaDB的安装可以直接添加更新官方的源,到/etc/yum.repos.d下创建MariaDB.repo
[mariadb]
name = MariaDB
baseurl = http://yum.mariadb.org/10.1/centos7-amd64
gpgkey=https://yum.mariadb.org/RPM-GPG-KEY-MariaDB
gpgcheck=1
保存后更新源
yum update
安装最新MariaDB
yum install mariadb mariadb-server
添加开机启动
systemctl enable mariadb
开启
systemctl start mariadb
在服务开启的状态下,设置最新密码
mysql_secure_installation